In this blog, you will learn how to make an object disappear in a video in python using the OpenCV library. Check out the demo below.
So let's get started.
We will start by importing the required libraries and define a variable to capture the video from my webcam.
import cv2
import numpy as np
cap = cv2.VideoCapture(0)
Now, start capturing the image frames from the camera and save the first frame in a variable called replace_image. But why we did this? Keep Reading.
ret, frame = cap.read()
frame = cv2.flip(frame, +1) ##Mirror image framereplace_image = frame ##live image to replace with
Let's write a while loop to capture the image frames continuously.
while(1):
    ret, frame = cap.read()         ##Read image frame    frame = cv2.flip(frame, +1)     ##Mirror image frame
    if not ret:                     ##If frame is not read then exit        break    if cv2.waitKey(1) == ord('s'):  ##While loop exit condition        break
Now we need to create an image mask to detect the object which will be completely invisible in the final result. I used a yellow color paper for this purpose.
frame2 = cv2.cvtColor(frame, cv2.COLOR_BGR2HSV)         ##BGR to HSVlb = np.array([0, 238, 0])
ub = np.array([255, 255, 255])
mask = cv2.inRange(frame2, lb, ub)
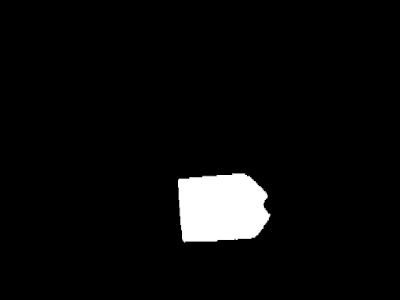
We will first convert the image frame from BGR to HSV and then apply upper and lower bounds to the frame and create a mast. If you did not understand this step then you must check out my blog on Object Detection and Tracking. The original image and image mask are shown below.
 |
| Original Image |
 |
| Masked Image |
Now we will apply two morphological techniques on this mask. the first one is opening morphology and the second is dilation.
opening = cv2.morphologyEx(mask, cv2.MORPH_OPEN, Kernal)        ##Morphology
Dilate = cv2.dilate(opening, Kernal, iterations=2)
The opening morphology is used to remove any noise(small white patches) in out mask. after implementing this method the mask will be noise-free. But then, what is the use of dilation? Well, after using opening method, you will notice that the image mask has shrunk a little bit. Because of this, in the resultant image yellow borders will be visible. We do not want that. The result should be as realistic as possible. So we dilate the mask which will increase the white portion in out mask a little large.
 |
| Dilate |
And now comes the tricky part. Pay attention.
To make an object invisible we simply want to detect an object and replace the area covered by that object with the original image(Where the object was not present at all). In our case, this original image is the replace_image which we saved at the start of our code. I hope the picture below explains the whole idea.
To achieve this, we need to perform the following 3 steps.
1. Look at the original image shown above. We need to replace the yellow part with the background(background is saved in replace_image). To do this we need to apply dilate mask to the replace_image. So now the yellow part will be replaced by the background. We will call this as midresult1.
midResult1 = cv2.bitwise_and(replace_image, replace_image, mask=Dilate)
 |
| midresult1 |
2. As you can see above we replaced the yellow part with the background. But the rest of the part is black. We want this black part to be the live image frames that are being captured in real-time. For this, first, we have to invert the dilate mask. If you see the result, now the yellow object is black and the rest of the part is white. Now, apply this mask on the frames that are continuously acquired from the camera. let us call this as midresult2.
 |
| Invert |
Invert = cv2.bitwise_not(Dilate, Dilate, mask=None)  ##invert the mask
midResult2 = cv2.bitwise_and(frame, frame, mask = Invert)
 |
| midresult2 |
3. In the final part just add midresult1 and midresult2. You will get the result as shown below.
 |
| Final Result |
That is it. Enjoy coding.
Check out the full code here:- https://github.com/vibhor69meshram/Make_Object_disappear

Comments
Post a Comment